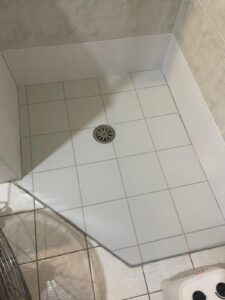
Option 2: Remove and Redo - Standard 6 Year Waterproofing Warranty
Standard Shower Repair
If you’ve decided that a more robust solution is needed than our Clear Over-Tile Waterproofing Membrane, this tile removal option might be for you.
In this process, the shower screen is removed along with the existing floor tiles and one row of wall tiles. The area is then waterproofed, re-tiled, and grouted. After that, the shower screen is reinstalled and the area is neatly caulked.
This application ensures that the new waterproofing membrane is installed directly over the existing screed, with proper fall incorporated. This allows any water that penetrates the grout to flow toward the drain, rather than pooling in the screed—helping to prevent mould, dampness, and long-term water damage. (As this is a remedial fix it is not a requirement to have the screed installed over th top of the screed but it is best practice).
If you have matching tiles available then these can be used otherwise a close match will be selected by the Tiler.
This might be the first time that you have been told that standard waterproofing today is only 6 years. If your unsure that is long enough for you than check out our flagship tile removal options which incorporates Tank’d Loose Laid Liner that comes with a 25 year warranty.
Want to see the work that is included?
Before
After
Check out the images of how the process works.
Step 1:
Remove Shower Screen
Step 2:
Remove tiles one row high and the entire floor being careful not to damage the screed if it is in good condition.
Step 3:
Prime the surface
Step 4:
Waterproofing first coat with Tank’d L.A.P (Liquid Applied Polyurethane) – Grey. This waterproofing coat on top of the screed to ensure water that gets through the grout will drain away and not sit in the screed.